Visual Style Approach
Hey there,
this post is a tutorial on how I set up my scene to render like a gameboy in Unity.
The entire game visuals are black and white, which then get mapped to a colour palette through a shader just before it gets presented to the player. If this sounds interesting to you (for the next game jam) then please enjoy this tutorial and let me know if it was handy! :)
Scene Setup
For the scene setup we will be using 2 cameras, one that renders the game and one that presents the rendered game scene to the player. This setup makes it possible to add a shader to the rendered game scene which will take care of the colouring step.
The pipeline that we'll have is as follows:
Game => GameCamera => RenderTexture => MainCanvas => colouring pass => MainCamera
First we will set up the MainCamera and MainCanvas, the main things you need to take into account is that we want to target this camera for the end result.
Select MainCamera and in its Camera component set
- Clear Flags to Solid Color
- Background color to blue (this is only to show how it works, after the tutorial you can set this to black)
- Set Clipping Planes
- Near to 0.3
- Far to 1
- Note: this is not to make the system work, this is an optimization because we don't want the camera to care about anything but canvas we will make in the next step.
Now create a Canvas in the scene and call it MainCanvas, in the Canvas component set
- Render Mode to Screen Space - Camera,
- drag MainCamera into Render Camera.
- Plane Distance to 1
This will make sure this canvas is being rendered to the correct camera.
Meanwhile in the Canvas Scaler component set
- UI Scale Mode to Scale With Screen Size
- Reference Resolution to (you guessed it) 160x144
- Screen Match Mode to Match Width Or Height
- Match to 1 (scale with height as a target).
Now add a Raw Image to MainCanvas and call it RawImage, set its Rect Transform values to
- Position to 0;0 (center of the screen)
- Size (width and height) to 160x144.
This should make sure that for any screen size that is used the rendered Game view will stay consistent. We're nearly done with the scene setup I promise!
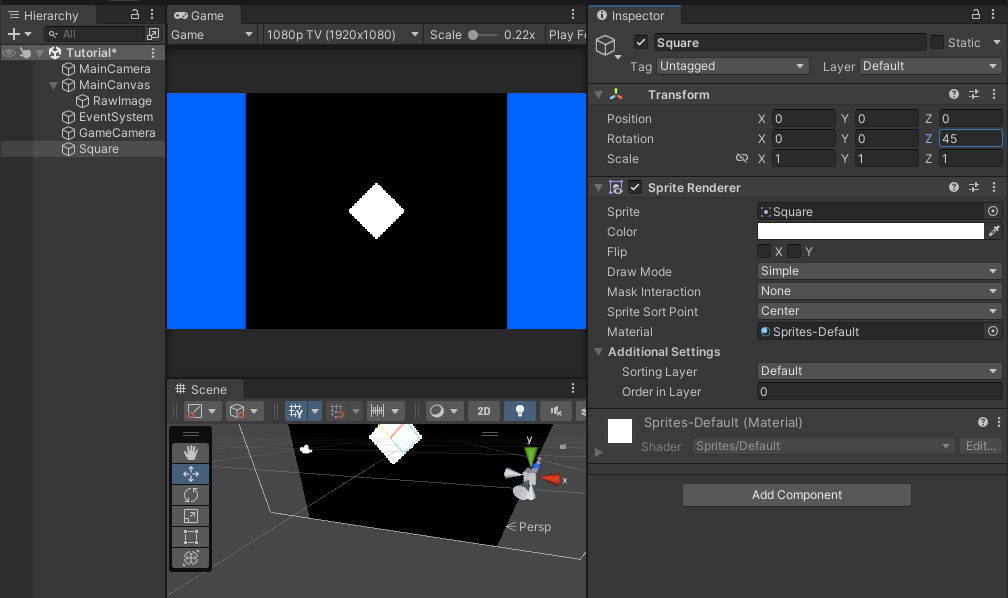
Now we need to create the GameCamera in the scene. Move it to be on Position 0; 0; -5.
Now in its Camera Component set
- Clear Flags to Solid Color
- Background color to black.
- Clipping Planes
- Near to 0.3
- Far to 20
- Note: just like the in MainCamera this is a performance optimization, most of our game logic will be on Z axis values close to 0, so we can tell the camera to not look too far into the distance, less work means more time for other stuff!
The screen probably turned black when you did all that, let us fix that by creating a RenderTexture in your project and call it GameboyRenderTexture. Now set its settings to
- Size to 160x144
- Filter Mode to Point
Now attach GameboyRenderTexture to the Target Texture in GameCamera, this will force the rendered result of GameCamera to be sent to the RenderTexture instead of the screen the player is looking at.
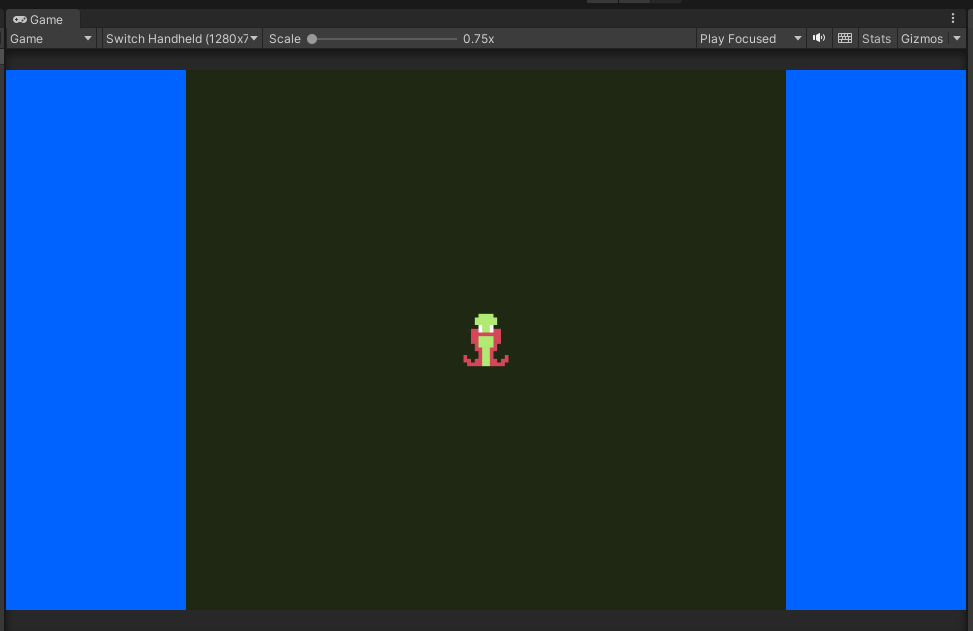
Remember the RawImage we created in MainCanvas? Add GameboyRenderTexture to the Texture field in the Raw Image component. Congratulations, now the game is being rendered to the gameboy view that the player sees.
Want proof? Add a 2D square in the scene and it should appear on the screen. Now rotate the 2D square, if everything went as expected it should show that it indeed is quite close to what a 160x144 screen would be rendering.
Awesome! We now have our scene setup, if you make all your assets in the colour scheme you selected that would already be job done. Though it could be that you want to change colour scheme per section of your game world, that'd be a resource intensive thing to make happen if you need to make all assets again every time your designer comes up with a new section... Instead we will be adding a shader and some cool textures to fix all of it while also giving your artist a bit more space to work with.
Shader
The shader will be available here. What this shader does is take the colour that is present on the pixel and take its Green value which it then maps to the X position on a colour palette that you link to the material. Note: any of the RGB values work as we will be drawing our artwork in greyscale now, so Red, Green and Blue channels should be the same.
Create a Material in the project and call it GameboyMaterial. Set Shader to be Unlit/GameboyShader, this will cause the inspector to show an entry called Palette. Here you can put the colour palette that will be used to add colour to the greyscale game.
Let us first put GameboyMaterial to work, select the RawImage that you created in MainCanvas and in the Raw Image component you assign Material to be GameboyMaterial. This will turn the gameboy view white, because we did not set a palette to look at (or you did set a palette and you already have a cool looking result).
I have created a couple palettes for you to use based on the GBJam 12 logo textures, but you can make any combination you think looks cool too! The basic rule it to go from dark to light, but I'm not your mom so enjoy tinkering with possible options :P
 |  |  |
 |  |  |
Import settings for the palettes can be set to
- Filter Mode to Point (no filter)
- Compression to None
This is to make sure no artifacting happens.
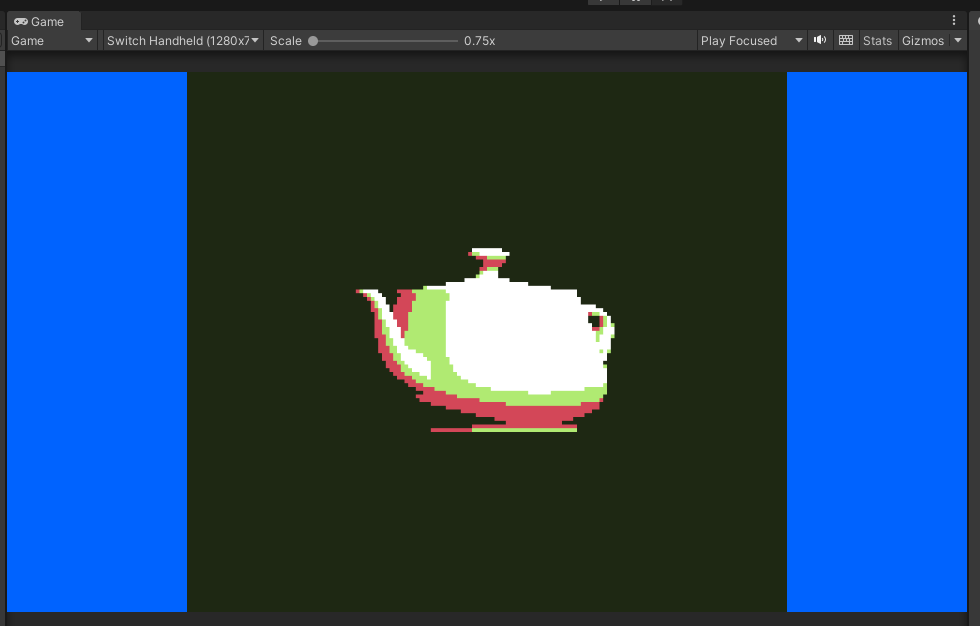
Go back to GameboyMaterial and drag one of the palettes you added into the Palette slot, your gameboy view will turn back to showing the 2D square... but slightly different! Now its taking the palette into account to render the result!
Ok, lets make sure it actually works: take this vampire sprite.

Import it with the following settings:
- Pixels Per Unit to 32
- Filter Mode to Point (no filter)
- Compression to None
Now assign the vampire sprite to the square you made. Et voila! That looks like a cool vampire following the rules of the colour scheme!
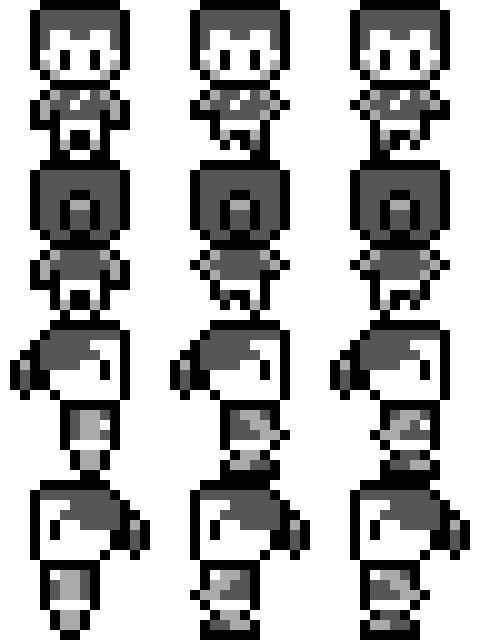
Now you have a scene that is ready to be used for the next Gameboy Jam! Though now your artist will just have to work in greyscale to make everything work :) For example my character looks like this:
This all also works with 3D models, but to get the best results I would need to add a dithering pattern. Maybe for the next game jam!
Leave a comment
Log in with itch.io to leave a comment.